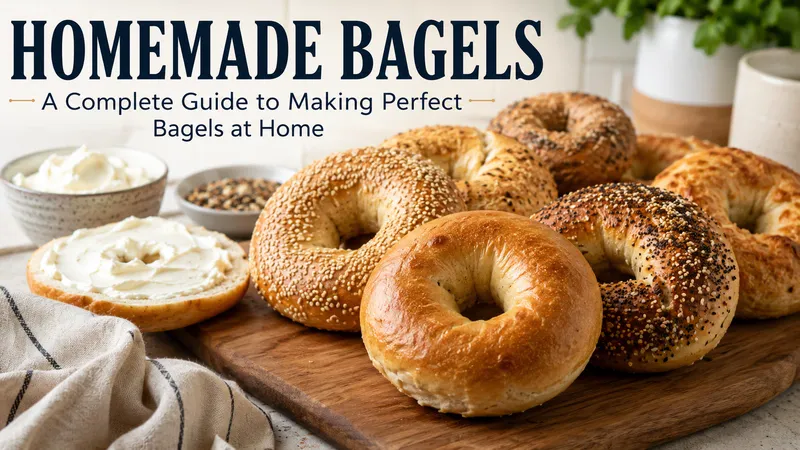
Fresh bagels have a texture that is hard to forget: a slightly crisp outside, a chewy center, and enough structure to hold cream cheese, eggs, smoked salmon, or your favorite sandwich fillings. The good news is that you do not need a professional bakery to make them. Making Homemade Bagels takes a few more steps than ordinary bread, but each step has a clear purpose. You mix a firm dough, develop the gluten, shape the rings, briefly boil them, and then bake them until golden brown. Once you understand the process, you can easily adjust the recipe to suit your preferred texture and flavor.
What Makes a Good Bagel?
A good bagel should have a firm, chewy crust and a dense but tender interior. Bread flour is a popular choice because its higher protein content helps create the strong gluten structure needed for that classic chew.
The dough should also feel noticeably firmer than typical sandwich-bread dough. Adding too much water can produce a softer, bread-like interior, while adding excessive flour can make the finished bagel unnecessarily hard.
Most importantly, bagels are boiled before baking. This water bath helps establish their distinctive exterior and contributes to the chewy texture.
Ingredients You Need
A basic bagel dough needs only a handful of ingredients:
- Bread flour
- Warm water
- Yeast
- Salt
- Barley malt syrup, honey, or another suitable sweetener
- Optional toppings
Bread flour gives you a strong starting point, but you can experiment with all-purpose flour after you understand the basic method.
For toppings, consider sesame seeds, poppy seeds, everything seasoning, coarse salt, dried onion, or cheese.
How to Make Homemade Bagels
1. Mix the Dough
Combine the flour, yeast, salt, sweetener, and water. Mix until the ingredients form a rough dough.
Do not worry if the dough initially feels dry or stiff. Bagel dough is supposed to be firm. Give the flour time to absorb the water before deciding that you need more liquid.
2. Knead Until Smooth
Kneading develops gluten, which provides the strength and elasticity needed for bagels.
A stand mixer can make this stage easier, but you can knead by hand if you are willing to put in some extra effort. The finished dough should feel smooth, elastic, and firm rather than loose and sticky.
A kitchen scale is also worth using. Weighing the flour and dividing the dough into equal portions produces more consistent bagels from batch to batch.
3. Let the Dough Rise
Cover the dough and let it rise until it becomes noticeably puffy.
The exact time depends on room temperature, yeast activity, and the recipe. Avoid relying entirely on the clock. If your kitchen is cool, fermentation may take longer; in a warm kitchen, the dough can develop faster.
For deeper flavor, some bagel methods use a longer refrigerated fermentation. This also makes the dough easier to handle when cold.
4. Divide and Shape
Divide the dough into equal pieces and form each piece into a smooth ball.
After a short rest, press a hole through the center and gently stretch it into a ring. Make the opening larger than your desired final size because the dough expands during proofing and baking.
A small hole can shrink considerably and may almost disappear in the oven.
Take your time during shaping. Smooth, tightly formed rings generally produce better-looking finished bagels.
5. Prepare the Water Bath
Bring a wide pot of water to a boil. Depending on your recipe, you can add barley malt syrup, honey, sugar, or another ingredient to the water.
A wide pot makes handling easier and prevents you from overcrowding the bagels.
6. Boil the Bagels
Carefully lower a few bagels into the water at a time. Boiling time varies by recipe, but roughly 30 seconds to 2 minutes per side is common. Longer boiling generally produces a thicker, chewier exterior.
Avoid boiling too many at once. They need enough room to move without sticking together.
Do not skip this step. Baking unboiled dough will give you something closer to a bread roll than a traditional bagel.
7. Add Toppings
Transfer the boiled bagels to a prepared baking sheet while their surfaces are still moist.
Add your toppings immediately. Everything seasoning, sesame seeds, poppy seeds, and coarse salt are easy choices.
An egg wash can help toppings adhere while also creating a shinier, more attractive crust.
8. Bake Until Golden Brown
Preheat your oven before you begin boiling the bagels.
A high baking temperature helps develop the crisp exterior and deep golden color associated with good bagels. Many established recipes use temperatures around 425°F to 450°F, with baking times commonly around 18 to 25 minutes.
Look at the bagels rather than relying only on the timer. They should have a firm surface and a rich golden-brown color.
Allow them to cool for at least several minutes before slicing. Cutting immediately can make the interior seem gummy.
Common Bagel Problems
Why Are My Bagels Flat?
Flat bagels can result from under- or over-proofing, weak dough development, overly soft dough, or excessive boiling.
Start by checking your fermentation and dough consistency before changing several ingredients at once.
Why Did the Hole Close?
The hole was probably too small when you shaped the dough. Stretch each ring generously before its final rise.
Why Are My Bagels Too Dense?
Check whether your dough actually had enough time to ferment. Also make sure you did not add excessive flour during kneading.
A firm dough is desirable, but it still needs enough moisture and fermentation to develop a pleasant interior.
Why Is the Crust Pale?
A pale crust can result from insufficient oven heat or an inadequate boiling stage. Make sure the oven is fully preheated and follow the boiling time in your chosen recipe.
Easy Flavor Variations
Once your basic bagels turn out consistently, experimentation becomes much more fun.
Everything bagels: Add an everything seasoning blend after boiling.
Cinnamon raisin: Mix raisins and cinnamon into the dough toward the end of kneading.
Cheese: Add shredded cheese to the dough or sprinkle it over the top before baking.
Sourdough: Use an established sourdough starter for a more complex flavor and longer fermentation.
You can also make mini bagels for children’s breakfasts, brunch buffets, or snack platters.
How to Store Bagels
Fresh bagels taste best on the day you bake them. If you need to keep them longer, store them well wrapped for short-term use or freeze them for longer storage.
Slicing bagels before freezing is particularly convenient. You can take out individual portions and toast them without waiting for the entire batch to thaw.
For the best texture, avoid leaving bagels exposed to air for long periods because the crust and interior can become stale.
A Better Approach for Beginners
If this is your first time making Homemade Bagels, resist the temptation to change everything at once.
Start with plain bagels. Use bread flour, weigh your ingredients, and follow one reliable method from beginning to end. Pay attention to how the dough feels after kneading, how much it expands during fermentation, and how it reacts in the water.
On your second batch, change one variable. Try everything seasoning or adjust the boiling time slightly.
This simple approach helps you understand your dough instead of depending entirely on a recipe’s clock.
Frequently Asked Questions
Do bagels have to be boiled?
Traditional bagels are boiled before baking. The water bath helps create their characteristic chewy exterior.
What flour is best?
Bread flour is an excellent starting point because its higher protein content supports gluten development and chew.
Can I prepare bagels the night before?
Yes. Refrigerated preparation can make morning baking easier and may contribute to more developed flavor.
Can I freeze bagels?
Yes. Cool them completely, slice them if desired, wrap them securely, and freeze them for later.
Final Thoughts
Making Homemade Bagels is easier once you stop thinking of the process as complicated baking and start viewing it as a series of simple stages. The firm dough creates structure, kneading develops gluten, fermentation builds the interior, boiling establishes the exterior, and baking produces the final crust.
The key is consistency. Weigh your ingredients, avoid adding unnecessary flour or water, shape the rings carefully, and pay attention to fermentation. Once you master the basic method, you can experiment with toppings, flavors, sizes, and even longer fermentation times. For more information, visit our website.